Custom Resources
You can create custom resources, add them to the design canvas, and create cloud templates that support your design and deployment needs.
Use vRealize Orchestrator to create custom resources
Each custom resource is based on a vRealize Orchestrator SDK inventory type and is created by a vRealize Orchestrator workflow that has an output which is an instance of your desired SDK type. Primitive types, such as Properties, Date, string, and number are not supported for the creation of custom resources.
Building Custom Resources
In order to build Custom Resources we will first need to build or identify a vRealize Orchestrator workflow for our use case. You will need to have at least two vRealize Orchestrator Workflows identified, one for the creation of the resource and one to destroy the resource when the deployment is deleted. In this blog we will build out a simple use case of creating a vCenter Folder along with the machine deployment .
The vRealize Orchestrator Workflow we will use in this example is called “Create Virtual Machine Folder” and the workflow to destroy the folder when the deployment is deleted is called “Delete Virtual Machine Folder”. Both of these are built in vRealize Orchestrator Workflows.
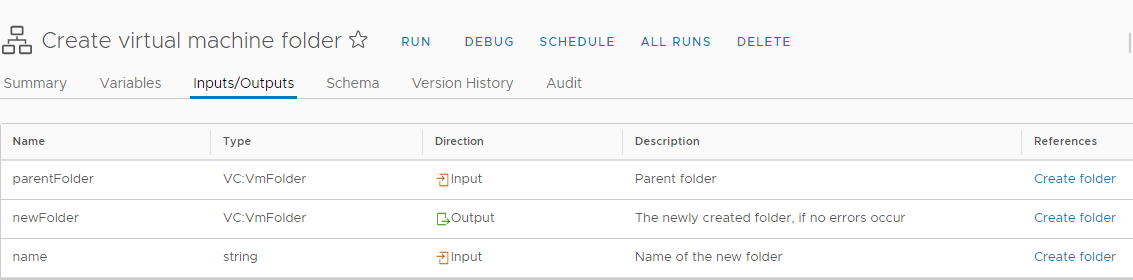

Notice that the “Create Virtual Machine Folder” has an Output for type VC:VmFolder, and the delete workflow has an Input for VC:VmFolder. This is needed in the event of a delete action.
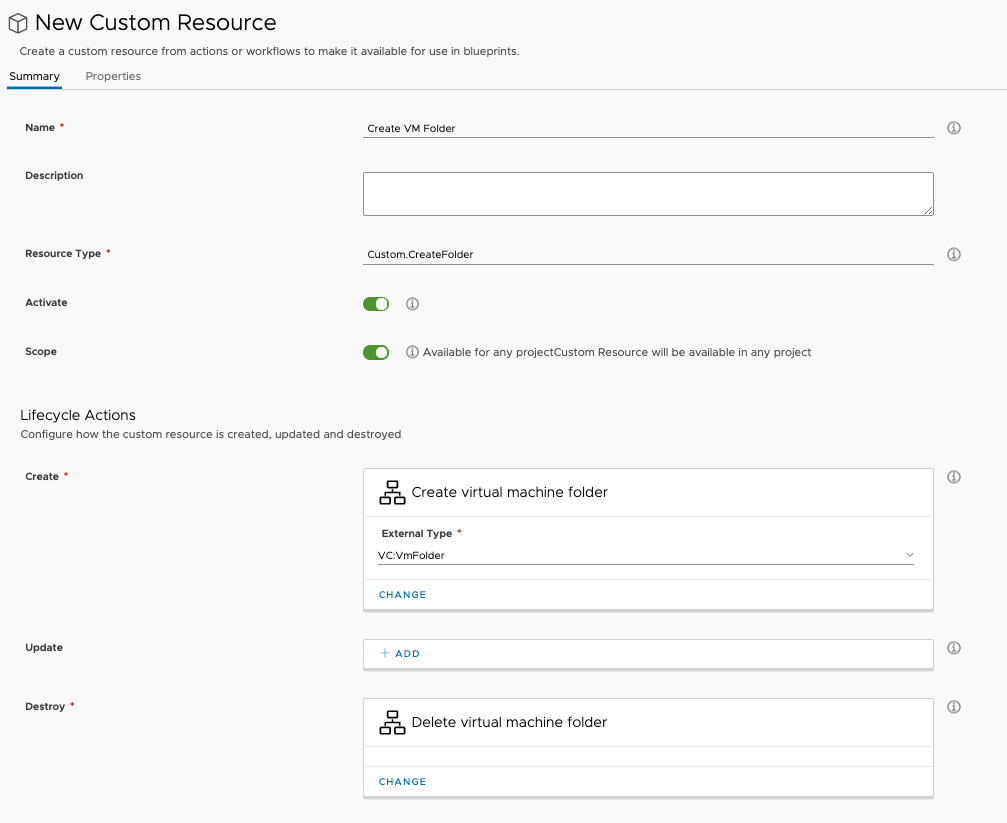
Once we have identified the vRO workflow, we can then use that workflow in our Custom Resource object within vRealize Automation Cloud Assembly. Within Cloud Assembly you will see a Design tab at the top, this is where you will configure cloud templates and custom resources. Click on Custom Resources and then New Custom Resource. Fill out the form with the following information:
Name – provide a name of the resource
Description – optional description
Resource Type – enter a name you want to give the resource, this will show up in the YAML code property – type. For example I entered Custom.CreateFolder.
Activate – choose this if you want the resource to be available now
Scope – define which projects can consume this resource, if you want all projects to see this resource then just leave it to the default.
After configuring the items above, you can then add the workflows you want to use under the LifeCycle Actions section. There are three types of actions you can configure – Create, Update and Destroy. The only two that are required are Create and Destroy. Notice that when you choose the “Create” workflow the system will auto-populate the External Type for you, in this case it found VC:VmFolder. This is an update we recently made to the product. This External Type is important in order for Update and Delete workflows to know what to do when they are triggered.
Note: For vRealize Automation 8.0 and 8.1 customers, you will need to type or enter in the External Type manually. Make sure you choose the appropriate external type from the vRO Workflow. There should be a corresponding output and input between Create and Destroy workflows.
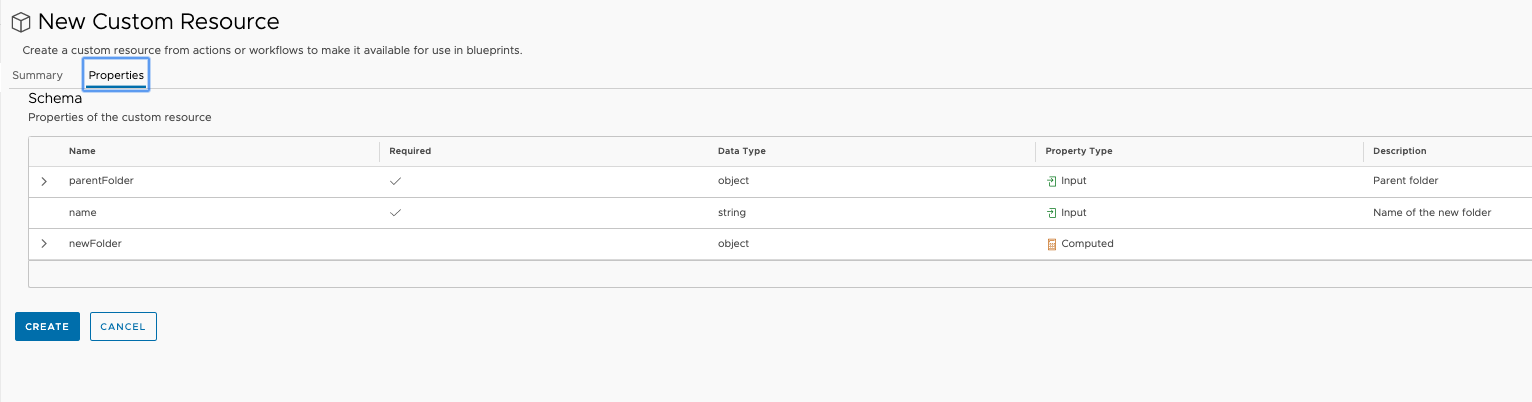
Another change that was recently made was putting the schema properties onto a Properties page. The schema elements are what get translated onto the cloud templates for configuration once the Custom Resource is dragged onto the cloud templates canvas.
Once you create the Custom Resource it will show up in the cloud templates as a Resource Type on the left hand side.
Note: If you modified the scope of the Custom Resource to a certain Project, then the Custom Resource will only show up if this cloud templates is also tied to the same Project.
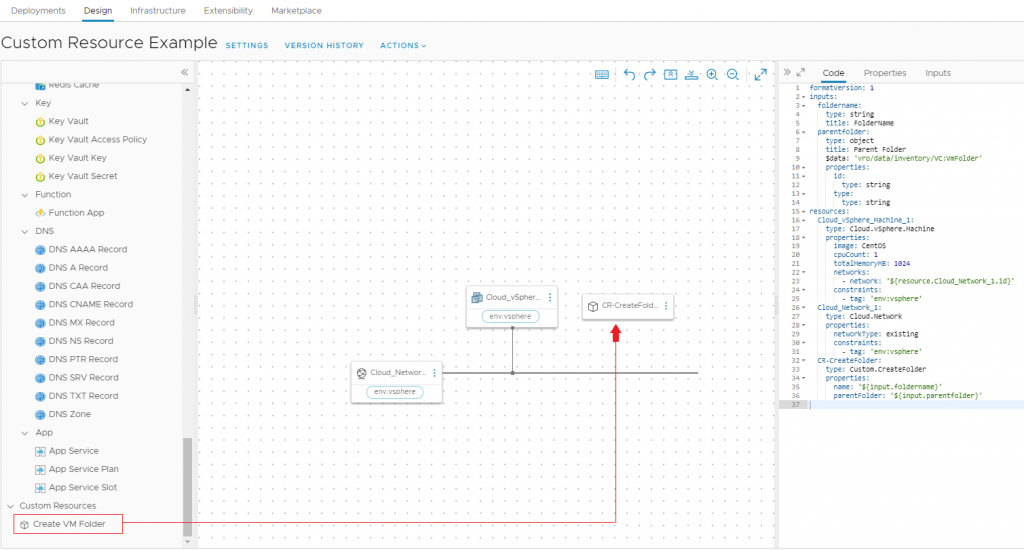
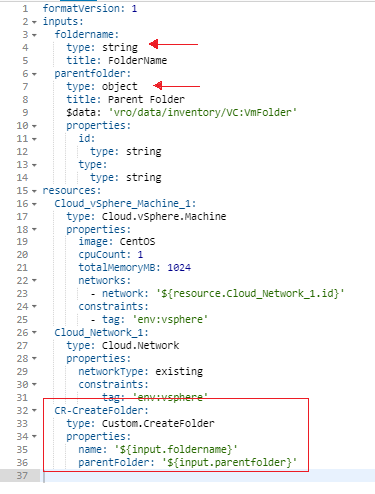
Once you drag the Custom Resource onto the canvas then the cloud templates YAML code will reflect the object. In this example I have already filled out the needed input bindings and path to the proper vRealize Orchestrator inventory section for VC:Folders. With this workflow we have both an Input for the folder name (type: string) and an object to query the parent folder (type: object). When you want to query via type:object then you will need to list out the relevant vRealize Orchestrator inventory path, in this case it is $data: ‘vro/data/inventory/VC:VmFolder’.
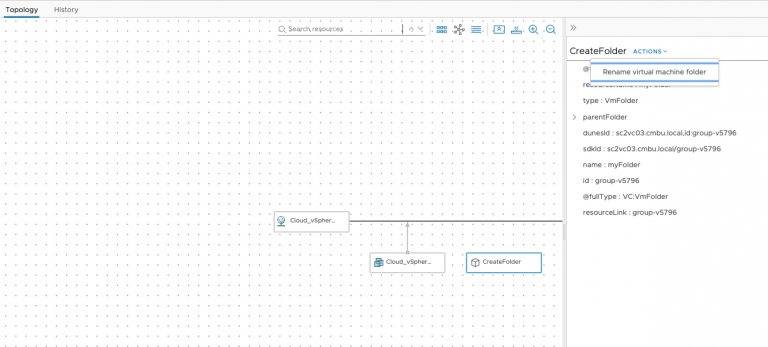
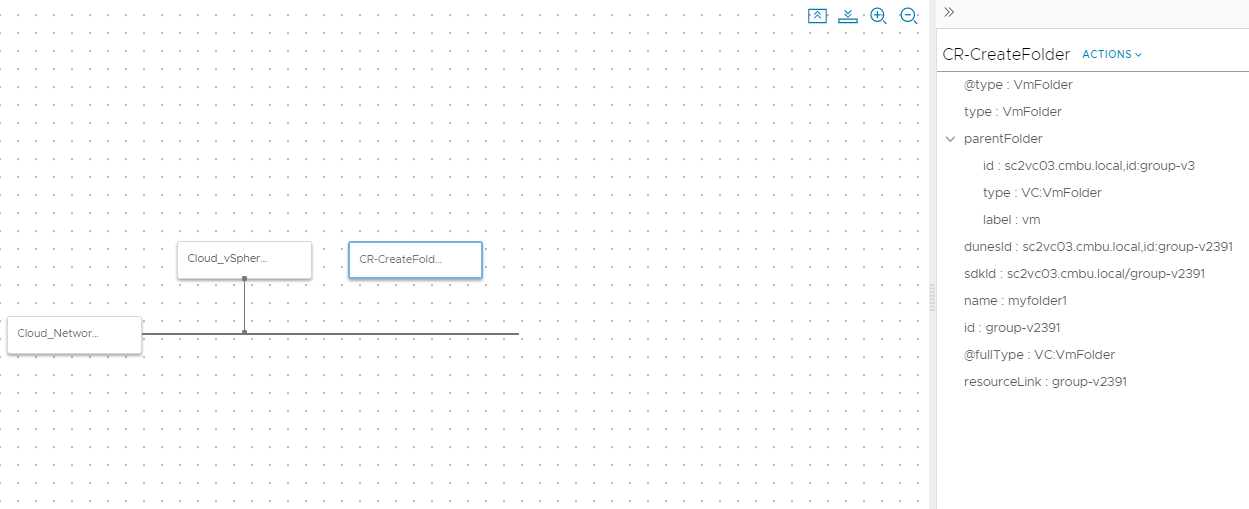
You can now deploy the cloud templates from Cloud Assembly or Service Broker.. Once deployed you can see some information about the Custom Resource in the deployment screen.
You can also add Day-2 Action workflows to the Custom Resource. From the Custom Resource page go to the bottom of the page and you will see Additional Actions section.

These actions will present themselves in the Action dropdown when you select the custom resource from the Deployment Topology.