
Resource Actions
In addition to the Day-2 actions that are already available for Resource Types within vRealize Automation , you can now configure custom Day-2 actions that make changes to your deployed resources. These custom day-2 actions are referred to in vRealize Automation as Resource Actions.
Building Resource Actions
In order to build a Resource Action you will need to first identify the vRealize Orchestrator workflow you want to use as the Day-2 Action.
Here is an example vRealize Orchestrator workflow that moves a VM to another folder within vCenter. Notice the two inputs – vms and folder. Those both point to the VC (vCenter) plugin so we can query VMs and Folder in the vCenter inventory. For this example there is also an associated action within vRealize Orchestrator that searches for all the VMs by name that is bound to Resource Action, we will see how the binding is done later.

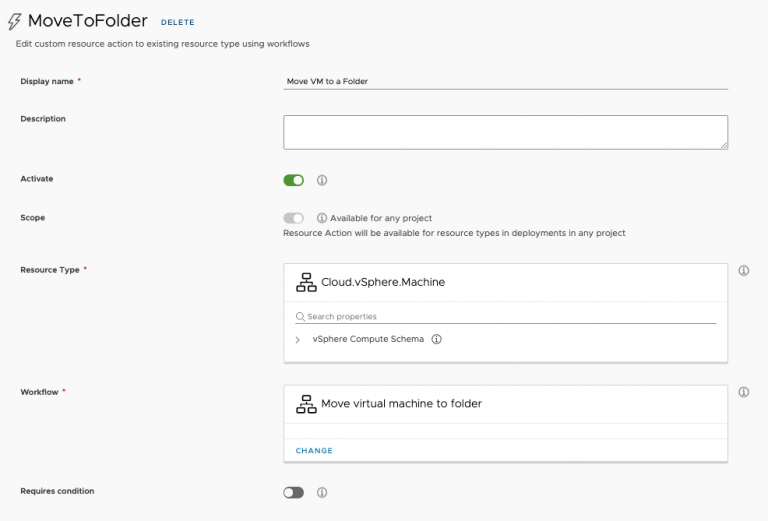
In order to create the Resource Action just go to the Design section where we created the Custom Resource earlier. There you will see a link on the left side called Resource Actions. Fill out the form with the following information:
Display Name – provide a name for the action
Description – optional description
Activate – choose this if you want the resource to be available now
Scope – define which projects can consume this resource, if you want all projects to see this resource then just leave it to the default.
Resource Type – resource type that you want the action bound to, such as Cloud.vSphere.Machine
Workflow – choose the vRealize Orchestrator workflow that will run the action
Requires Condition – choose whether you want a condition tied to the action, such as osType = Linux
Property Binding – create and manage a binding action from vRealize Orchestrator. There are now three out-of-the-box bindings:
1. in-request
2. direct
3. with binding action
Edit Request Parameters – choose this if you want to use the Custom Designer to create a Custom Form for the user to interact with when choosing the action from the deployment menu.
Your Resource Action may look something like this.
Now lets discuss Property Bindings in more detail. The latest update provides a few different ways to do the binding to the resource you are taking the action on. For instance in previous versions of vRealize Automation 8.1 and 8.0, if you wanted to bind an action to VM you had to create a binding script and attach it to the Resource Action. A binding action may look like this:
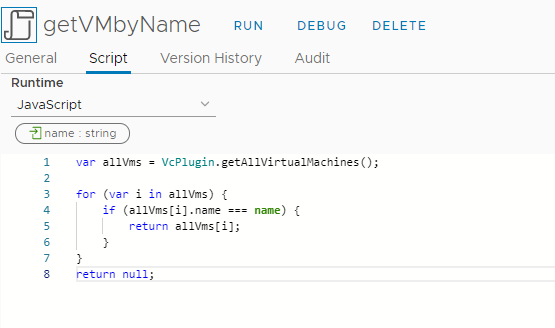
Then just configure Return Type to VC:VirtualMachine and create an input called name and leave it as a string value..
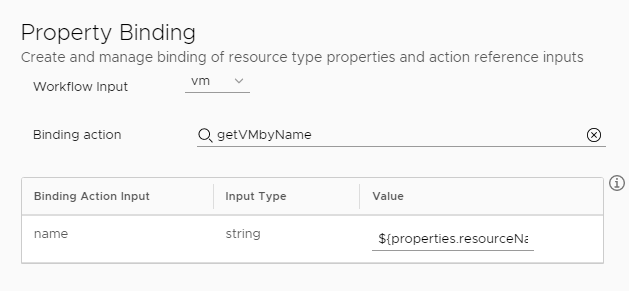
The below image shows how to bind the vRealize Orchestrator action to the Resource Action in the UI. Basically choose the action then for the Value add ${properties.resourceName}, this is for vRealize Automation 8.1 and 8.0.
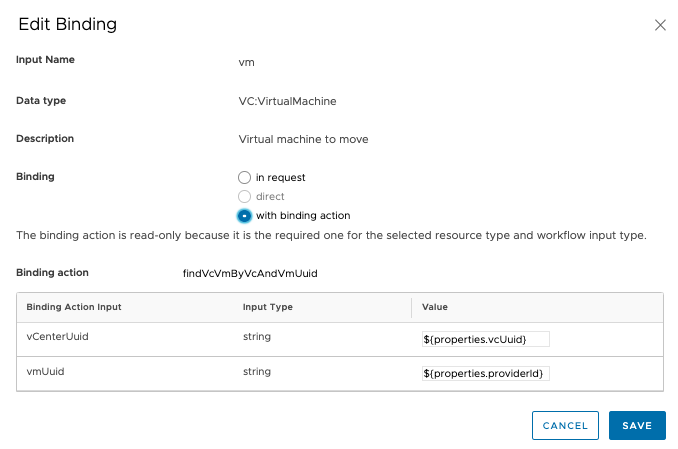
However in vRealize Automation Cloud (and vRealize Automation 8.2 or later) we now have built in binding actions and other methods to do the bindings. Below is a screenshot of the options
In-Request basically means the value will be set at request time. So the cloud templates will find the value via a query that is defined in the YAML.
direct allows you to define the property (schema) of the resource to pass as a binding (e.g., address, name, etc.) Available for primitive types and passed to input when executing action.
with binding action allows you to choose a binding vRealize Orchestrator action to run, we will only show actions that will bind to the Data Type (e.g. – VC:VirtualMachine can use action findVcVmByVcAndVmUuid)
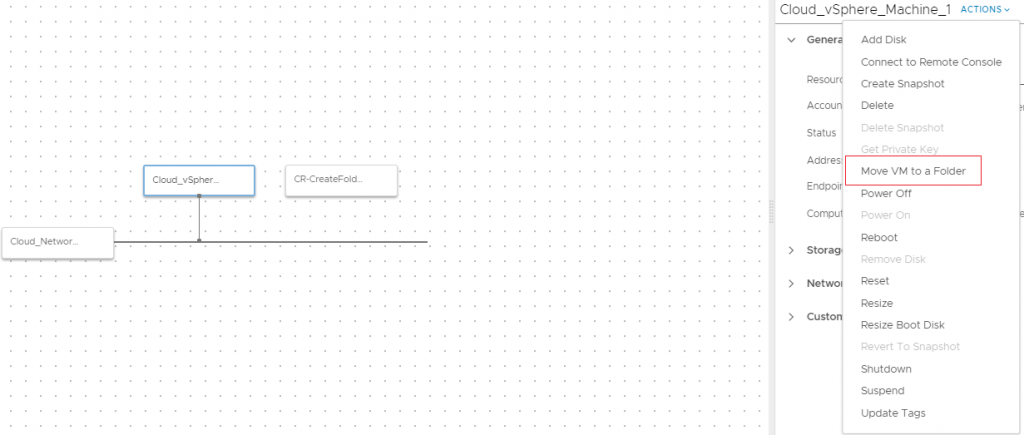
After this has been setup you are ready to deploy a cloud templates that has a vSphere Machine so we can then see the action to move it to a folder within the Actions menu (it could be the folder you created ealier). Remember the machine that is being deployed is a Resource Type: Cloud.vSphere.Machine, I used that Resource Type here because I want to be able to move it to another vCenter folder. After it is deployed we now see the option to “Move to a Folder” from the Actions dropdown list when you click on the vSphere machine on the canvas. Once that action is chosen the user will be prompted for the destination folder.
vRealize Automation 8.3 and later / vRealize Cloud Updates
We recently made some updates to Custom Resource and Resource Actions by allowing additional binding actions in the Edit Request Parameters section. I will showcase this being done in Resource Actions however this could also be done for Custom Resources.
Basically I will show a simple example where I want to create a custom name for snapshots based on deployment criteria. First create a resource action and then click Edit Request Parameter at the bottom of the Resource Action page.
Once in there look for a field that would create a name (in my example I used a vRealize Orchestrator Workflow called “Create a Snapshot” and one of the fields is the Snapshot name).
Now we can modify the Properties of that name field.
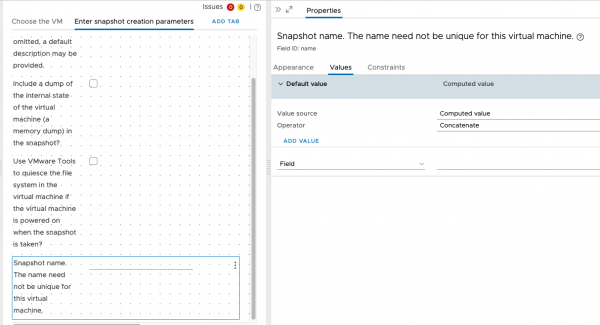
By using the Value Source = Computed Value and Operator = Concatenate, additional fields and be put together to ultimately create the name we want.
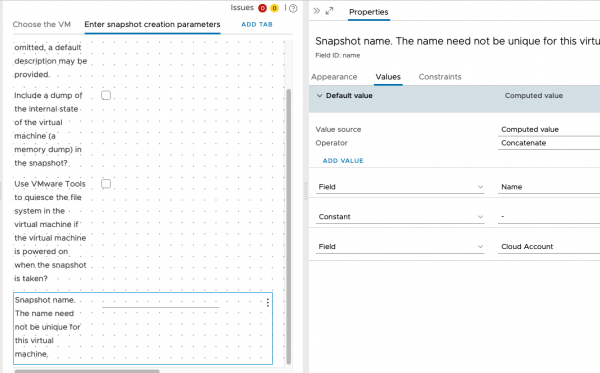
Now that the two fields have been concatenated we should see a naming pattern that matches the values in our Day 2 action. Lets see how it look when the createsnap action is initiated by the user on a vsphere machine that has been deployed.

The snapshot name combined the two values to create the desired name.